If you ache to move to the country so you can grow your own food and raise your own chickens, you might find that you can start right where you are. Anyone can grow food, even if you live in a tiny apartment!
"Fresh Food From Small Spaces" by R.J. Rupenthal shows you how to make the most from small spaces. Anyone can sprout seeds on a kitchen counter to add nutrition to their meals. A sunny window sill is all it takes to get things started. Even a small balcony can be enough space to grow a few pounds of tomatoes or peppers and other delicious foods.
Although I do not have a tiny space, this book was exciting to me. I lived in apartments and condos with nothing more than a small patio or balcony for outdoor space for the first nine years of my married life. If I had only known what I discovered in this book!!
In this book, you will learn what to use for planting containers, how to use vertical space and reflected light, how to start transplants and grow fruit and berries. You'll also learn how to do some amazing things in your own kitchen, such as sprouting, making kefir, yogurt and fermented foods, and cultivating mushrooms. You might even live in a situation where you can eke out enough space to raise chickens and honeybees! In addition, you will discover how to make compost using worms and how to prepare for survival in the case of food shortages.
In my own backyard, I've been thinking in terms of square-foot gardening. This book focuses on square-inch gardening to make the most out of tiny spaces. This is the only book of its kind that I've been able to find. No other book gives such great detail about "farming" from your apartment!
So if you've been daydreaming of the day you will have your own "farm", even if it's just a large backyard, then dream no more. Start where you are!
Showing posts with label Garden. Show all posts
September 3, 2011
May 6, 2011
Grow Your Own Fruit
A couple of months ago, I walked into Trader Joe's (where I do my primary grocery shopping), and saw this in the produce section:
Pummelo (also known as pomelo) for $1.49 each. I happen to have a pomelo tree in my backyard, and they are MUCH larger than the ones at Trader Joe's. This year we harvested roughly 100 of these from our tree, but mine were organic. At Trader Joe's prices, that's $149 in fruit that I got for free.
I also have a tangerine tree. These sell for about $0.60 each. Our tree produces about 300 pieces of fruit, which means that we harvested about $180 in free food from that tree.
Consider planting some fruit trees in your yard. They provide excellent shade, decrease the cooling costs for your home, improve the air quality around your home, and are an amazing source of organic food for your family. Talk to someone from your local nursery to find out what the best varieties are for your region and when and how to plant them.
April 29, 2011
Homegrown Revolution
Last week I shared my favorite website for urban homesteading, Path to Freedom's Little Homestead in the City. Here is a ten-minute "documentary" called Homegrown Revolution that gives you a little tour around their property. It will inspire you like crazy!
April 22, 2011
Urban "Farm"
Urban homesteading and urban farming are big buzz words these days, and for good reason. Our society has reached a place where we rely almost exclusively on conglomerate food delivery systems (aka supermarkets). Gone are the days of Laura's little house in the midwest prairie where Pa built a house with raw materials that he gathered with his bare hands and where nearly everything they ate was grown, hunted or foraged.
Yet more and more Americans feel compelled to start growing their own foods again. Their reasons are varied: healthier food, less expensive food, hobby, or a desire to be a little more self-reliant. Whatever their reasons, more people are trying to relearn what was once common knowledge to pioneering Americans.
My own journey began with two large terra cotta pots. I planted a tomato plant in one and a cucumber plant in another. I harvested several cucumbers, but not one tomato, although the plant towered over my head. I learned that they were too shaded on my patio. I graduated to a four-foot by four-foot raised bed, then added another, then doubled that. It's been a process of experimentation, some errors and failures, and plenty of delicious food that I started from seed.
I also added chickens. Just one to start with. My kids named her "Chicken". Then we added three more: Buttercup, Milly and Jackson. Every egg that is found brings a sense of wonder and thrill to my children, and I love the extra food it puts on my table. There is something so empowering and exciting that comes from producing food on your own piece of property. And if I can do it in the scorching Sonoran Desert, you can do it wherever you live!
One of the most inspiring websites I've ever visited is Path to Freedom's Little Homestead in the City. The Dervaes family is a living example of breaking the grip of America's food system and "big ag". They live in an ordinary home in the heart of Pasadena, California, with only one-tenth of an acre of yard space. Yet in that setting, they produce 350 different kinds of vegetables, herbs, fruits and berries, harvesting about 6,000 pounds annually! They also collect thousands of eggs per year from their backyard foul, and honey from their own beehives. This feeds their family of five and also produces income as they sell to local restaurants and neighbors.
But the Dervaes do so much more than just produce food on their tiny piece of property. You really ought to check out their website. It will inspire you and help you to understand just how much you can do to be more self-reliant, even in the most urban setting! Visit Path to Freedom's Little Homestead in the City to find out more.
March 23, 2011
Selecting Seeds
In my last post, I showed you how to build a simple raised garden bed so you can begin growing some of your own food. Once your garden is in place, it's time to plant. But what should you put in there? Some people purchase starts from a nursery or garden center. There are two reasons why I don't do this: these usually are not organic (an important factor for me), and they are expensive when compared to the alternative.
What is the alternative? Buy seeds and plant them directly into your own garden. If you live in cooler climates, a small greenhouse might be a great way to get an early start on growing your seeds.
How do you choose seeds? There are three things that I look for: organic, non-GMO and heirloom. Organic is the most important factor for me in buying seeds, but I also look for heirloom... seeds that haven't been tampered with over time, and non-GMO (similar to heirloom in that they have not been genetically modified).
There are three terrific sources I like to recommend for obtaining seeds. I purchase most of mine at Whole Foods. They sell a brand of seeds called Botanical Interests. Another fabulous seed company is Seeds of Change. I love what this company is doing. Another company that I like is called Baker Creek Seeds. They really focus on preserving heirloom seeds as well as rare seeds. All of these are great resources for the best seeds.
Seed catalogs or websites are great places to stir up some inspiration. What do you want to grow? Do you have enough garden space to grow all the things you want? Draw a "map" of your garden. This will help you to decide what to plant and how much.
Happy gardening!
March 21, 2011
How To Start a Garden
I believe that I have fully recovered from being a former garden-hater (see the “About This Blog” page for the full story). I can only laugh at myself as I sit here at my computer and put together a post about starting a garden.
My first major step toward garden-hating recovery took place two years after I had married and moved to Arizona. My husband and I had made plans to spend the entire summer in Washington/Idaho with my family. I called my mom on the phone and emphatically insisted that she wait until I got there to plant her garden, because I wanted to help. I’m not sure if she passed out or became light-headed, because she never revealed her physical reaction to my demand.
It wasn’t until years later that my husband and I finally bought our first house and lived in a structure other than an apartment or condo. We had so much space in our backyard that was not being used that the thought occurred to me that I could plant my own garden. But gardening in Arizona and gardening in the Pacific Northwest are two different things!
Can I plant in this soil that has the consistency of concrete? What can I plant? When do I plant it? Can I grow throughout the torturous summer heat? Can I grow through the winter, even if it freezes for a few nights? I had so many questions and virtually no answers.
My garden-loving mother bought me a book that got me started in the right direction: “All New Square-Foot Gardening” by Mel Batholomew.
This book taught me the how-to of creating above-ground garden beds, how to grow far more in the square-foot method compared to the straight row method, and how to grow vertically in a raised bed.
The best resource for those who do live in the Sonoran Desert is the Mary Irish book, “Gardening in the Deserts of Arizona”.
This book gives great detail about what to do with your garden, flowers, lawn, and trees each month of the year.
With the knowledge from these two books, I finally had the courage to give desert gardening a try. I began with one 4’x4’ bed. A year later, I added a second bed. This year I have added two more beds. This gives me a combined total of 64 sq. ft. of garden space.
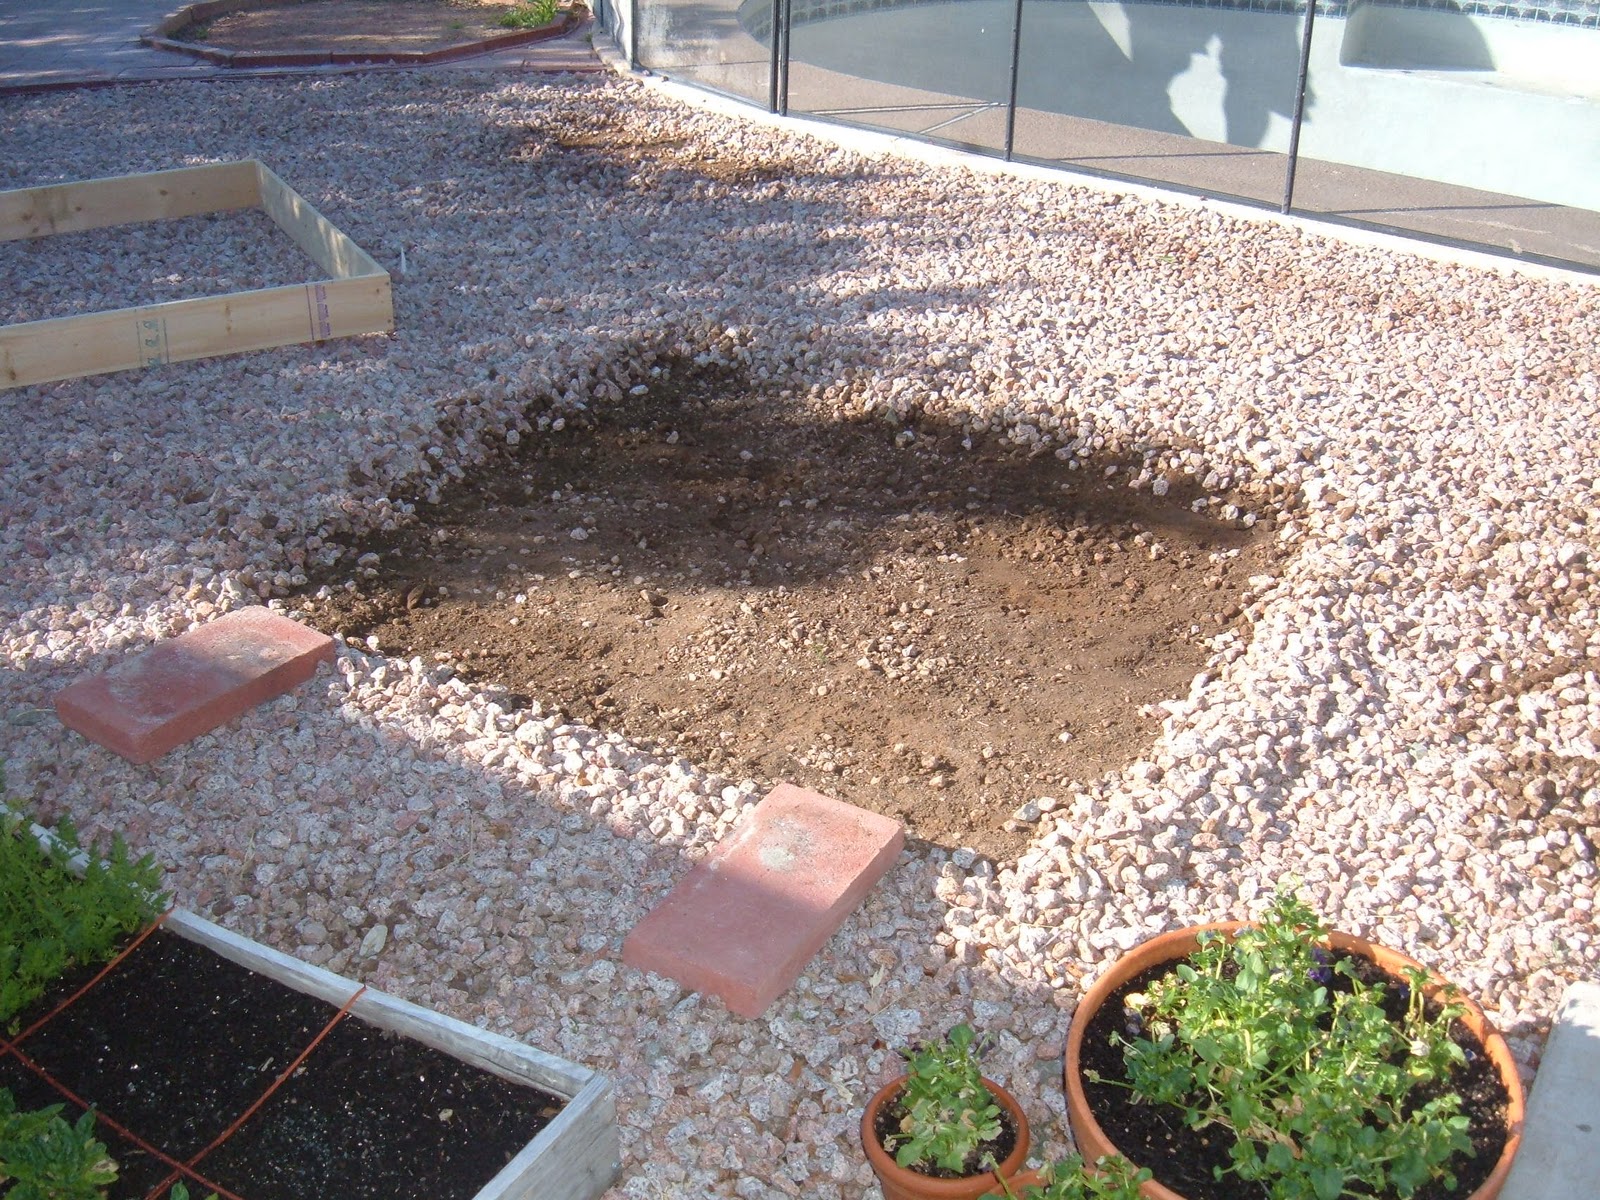
Once you’ve selected the location for your garden bed, you will want to prepare the ground. My yard is full of granite, so I had to shovel it up to make way for my garden.
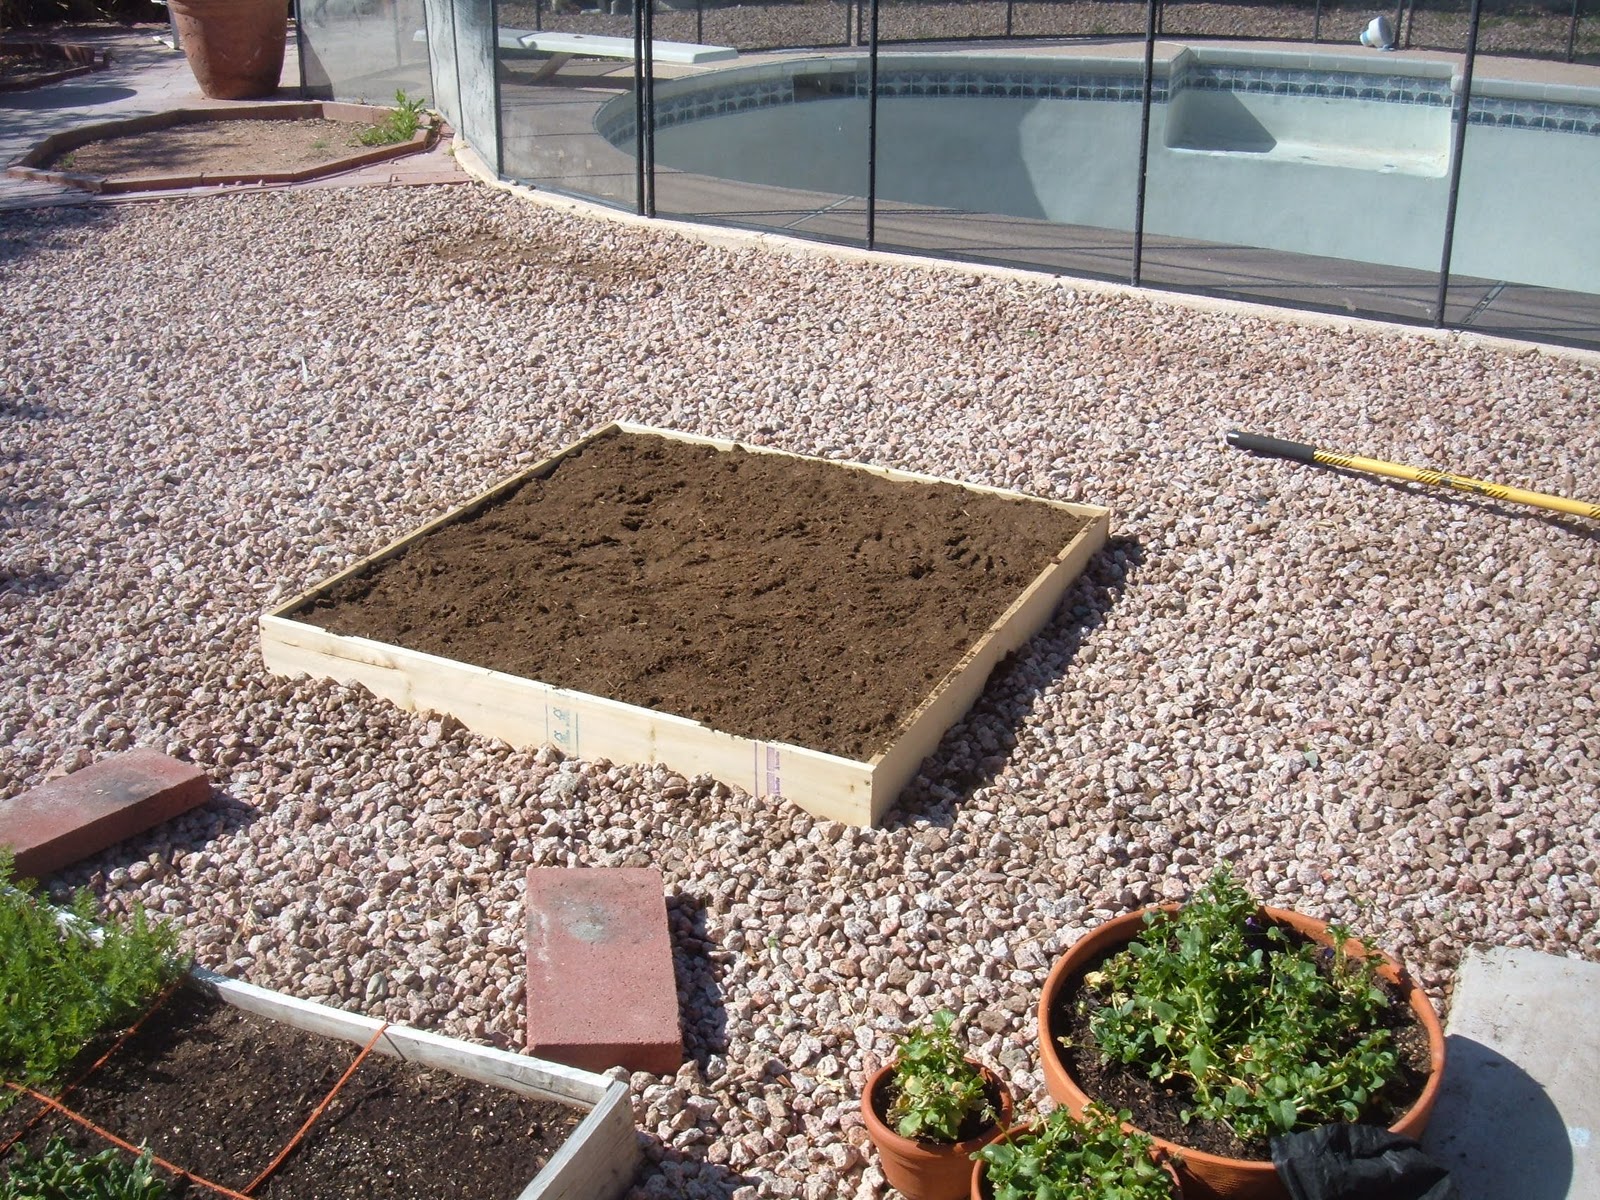
Next, I placed a layer of weed cloth on the ground and placed my wooden frame over it. I have used 1”x6” pieces of lumber, screwed together at the ends.
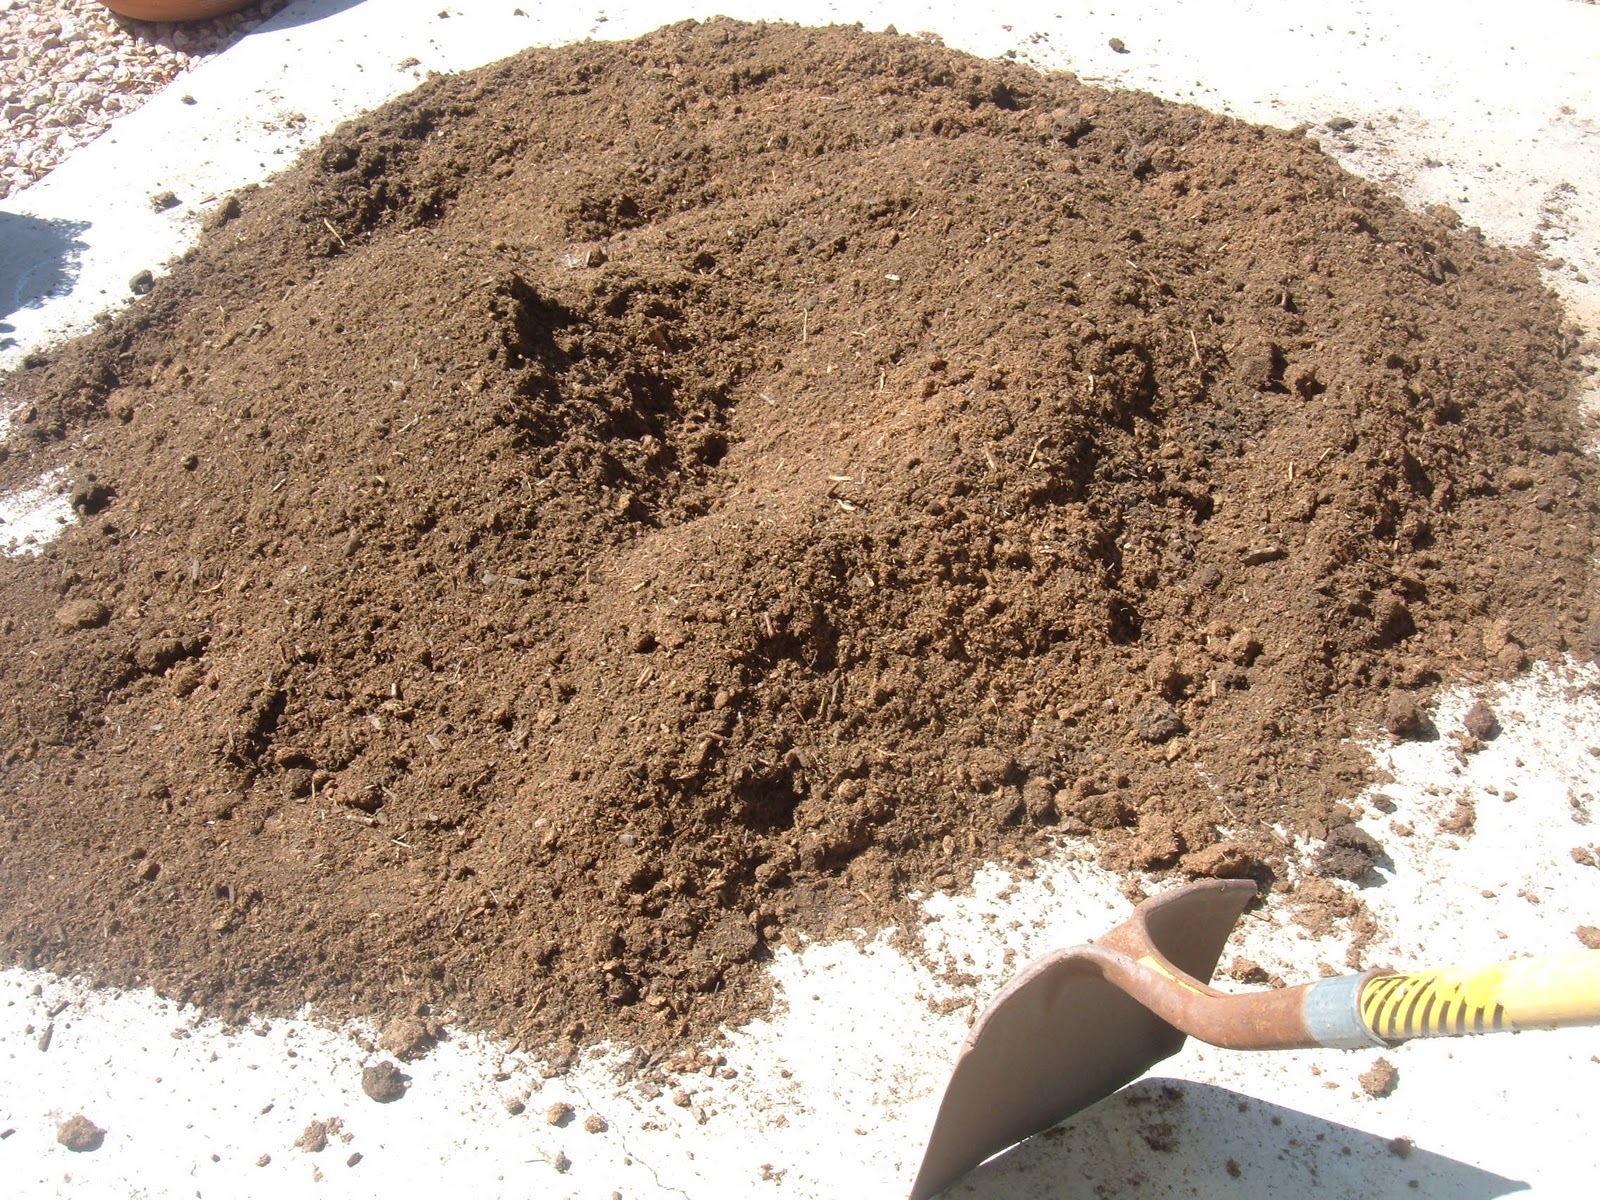
I combined my soil on the patio, but if you don’t have a patio near your garden, I recommend that you use a tarp so you don’t lose your soil to the lawn.
Mel’s mix calls for 1/3 peat moss, 1/3 vermiculite, and 1/3 other soil products, such as manure, compost, etc. My first two beds were made with this precise mixture. Recently, I have wondered if vermiculite is safe. I’m not sure if it is free of asbestos. It is also difficult to find and is rather pricey. For my two new beds, I have opted out of using vermiculite. Here is what I added to EACH SQUARE:
2 bags of Organic Choice garden soil (3 cubic feet)
2 bags of peat moss (4.4 cubic feet)
2 bags of steer manure (2 cubic feet)
You need about 8 cubic feet of soil to fill your box. Once you’ve combined your “ingredients”, fill up the frame.
To give your garden a tidy appearance and to aid in the square foot method, you will need to use small wooden dividers to section your 4’x4’ square into sixteen 1’x1’ squares. I went the frugal route and used yarn. I hammered nails into the frame and wrapped yarn around them. It works just as well and can easily be removed once your plants begin to grow, although I like to leave mine.
You are now ready to plant. Find out the recommended planting times for various vegetables, flowers or herbs. I water by hand with a hose that has a shower attachment at the end. As for weeding, I do that… RARELY! With this method, I rarely have weeds.
It is truly amazing how much you can grow in one 4’x4’ square. This winter, I harvested the following:
54 beets
64 carrots
8 spinach plants
32 radishes
I also turned one entire box into a strawberry patch. It began with a very small plant, but it has spread to fill over half the box already.
These raised garden beds can be used on a patio or a rooftop as well. Some who are physically unable to get down to the ground to garden can have their box built on legs where they can stand or sit to work in it.
What are you waiting for? Get your garden beds ready and choose your seeds. We’ll talk more about seeds in the next post.
Subscribe to:
Posts (Atom)