The first time I heard of a solar oven was an article my mom gave to me about women in Africa whose lives were being saved by solar ovens. Sudanese women living in refugee camps in Chad would have to venture out of the camp every day to scrounge up wood so they could build fires for cooking. Leaving the camp put them in danger. Women were often raped and even killed as they searched for wood.
An organization came to the rescue by introducing these women to solar ovens made with cardboard boxes and aluminum foil. 75% of the women in one particular camp stopped their daily search for wood and used the solar ovens. This also gave them more time to care for their families, and even time to learn how to read! In some places in Africa, the women have begun to construct these simple solar ovens in order to sell them to their neighbors, thus producing income for their impoverished families.
Being that I live in the Sonoran Desert of Arizona, I figured this would be a fabulous introduction for my family to the use of solar energy. I could probably produce all the solar energy I needed for my entire home if my roof was covered with solar panels. I'm quite disappointed at the cost to do so, however. But a solar oven built from a cardboard box... there's no reason I could't give that a try!
I turned this into a homeschool project with my children. They really enjoyed following all the steps for building it. There is a huge variety of solar ovens, starting with something as simple as a pizza box.
Watch this short video to learn how to make an incredibly simple pizza box solar oven:
If you want something a little more substantial so that you can cook something larger in size, you can build a small cardboard box oven, like the one our family made. CLICK HERE for the directions.
Want something a little more permanent and long lasting? CLICK HERE for instructions to make one out of wood instead of cardboard.
If you prefer to purchase a manufactured solar oven and have the money to do so, the Urban Homestead Supply offers three varieties.
Have you ever wondered how you would cook food if you had no electricity for an extended period of time? It might be a good idea to learn how right now when there is no pressure to figure it out. This could simplify your life if an emergency arose that eliminated your access to electrical power. Give it a try. Start with the simple pizza box. It's a miniscule investment of time and money. You just might enjoy it.
Showing posts with label Homemade. Show all posts
Showing posts with label Homemade. Show all posts
May 4, 2011

April 8, 2011
Toffee-Chocolate Matzah
This particular post is going to veer away from what you might consider "healthy", but I believe a good homemade dessert is far better for you than a processed, pre-packaged dessert from the supermarket. Use organic ingredients to increase the nutritional factor.
With Passover quickly approaching, I thought I'd share my favorite Passover treat, Homemade Toffee-Chocolate Matzah from Martha Stewart's website. You can print it directly from her site, or get it here:
Makes 4 sheets.
4 sheets unsalted non-egg matzah
1/2 cup (1 stick) unsalted butter, cut into small pieces
1 cup packed dark-brown sugar
1 (12-oz.) package semisweet chocolate chips (2 cups)
Coarse sea salt
1. Preheat oven to 250 degrees.
2. Line a baking sheet with parchment paper. Place matzah in an even layer on baking sheet and set aside.
3. Melt butter in a saucepan over medium-low heat. Add brown sugar and immediately reduce temperature to low. Cook, stirring, adjusting heat as necessary, until sugar has completely dissolved and begins to bubble. Drizzle toffee over matzah and spread to cover using a spatula.
4. Transfer toffee-covered matzah to oven and bake until toffee has a rich, shiny sheen, 10 to 20 minutes. Remove from oven and sprinkle with chocolate chips. Tent matzah with aluminum foil and let stand 20 to 30 minutes.
5. Remove foil tent and spread melted chocolate over matzah to cover; sprinkle with sea salt. Transfer matzah to refrigerator and let chill at least 2 hours.
6. Break chilled matzah into pieces. Matzah will keep in an airtight container for up to 4 days at room temperature.
With Passover quickly approaching, I thought I'd share my favorite Passover treat, Homemade Toffee-Chocolate Matzah from Martha Stewart's website. You can print it directly from her site, or get it here:
Makes 4 sheets.
4 sheets unsalted non-egg matzah
1/2 cup (1 stick) unsalted butter, cut into small pieces
1 cup packed dark-brown sugar
1 (12-oz.) package semisweet chocolate chips (2 cups)
Coarse sea salt
1. Preheat oven to 250 degrees.
2. Line a baking sheet with parchment paper. Place matzah in an even layer on baking sheet and set aside.
3. Melt butter in a saucepan over medium-low heat. Add brown sugar and immediately reduce temperature to low. Cook, stirring, adjusting heat as necessary, until sugar has completely dissolved and begins to bubble. Drizzle toffee over matzah and spread to cover using a spatula.
4. Transfer toffee-covered matzah to oven and bake until toffee has a rich, shiny sheen, 10 to 20 minutes. Remove from oven and sprinkle with chocolate chips. Tent matzah with aluminum foil and let stand 20 to 30 minutes.
5. Remove foil tent and spread melted chocolate over matzah to cover; sprinkle with sea salt. Transfer matzah to refrigerator and let chill at least 2 hours.
6. Break chilled matzah into pieces. Matzah will keep in an airtight container for up to 4 days at room temperature.
April 4, 2011
Jojoba Oil
I have been attending a monthly class to learn about using herbs to improve health. The last class I attended was exceptionally fun. The fifteen women in attendance enjoyed facials with homemade products. After using a blend of oils and herbs to cleanse the face, we did a clay mask. We finished up, not with moisturizer as I had expected, but with 100% pure jojoba oil.
I have never used straight oil on my face. My forehead turns into a grease pit quite easily, and it just didn't make sense to put oil there on purpose. But for the sake of experimenting, I tried the jojoba oil.
The next morning I showered, and when I finally got in front of the mirror, I was stunned! The skin on my face looked like it belonged to someone else! It was so smooth, clear, and glowing. My forehead was not oily like I thought it would be, even after hours of sleeping.
Jojoba oil isn't really an oil, but rather a "wax ester". Out of all the compounds in nature, it is the most similar to human skin oil (sebum). The theory is that jojoba can cause your skin to think it has produced enough oil, thereby balancing oil production.
Jojoba oil is not water-based, so it does not evaporate during the day like moisturizers. It's easy to spread over the skin and it absorbs well. Unlike most oils, it does not become rancid or lose antioxidants over time.
You can apply it directly to your skin, or add a few drops to your moisturizer before applying. It works beautifully to remove makeup without irritation to the eyes. Jojoba oil is very beneficial as a hair product. Massaging it into the scalp helps prevent dandruff. A small amount can be worked into the hair as a leave-in conditioner.
Jojoba oil can be expensive, but it is worth every penny. Considering the number of products it can replace, it is a work-horse ingredient.
I have never used straight oil on my face. My forehead turns into a grease pit quite easily, and it just didn't make sense to put oil there on purpose. But for the sake of experimenting, I tried the jojoba oil.
The next morning I showered, and when I finally got in front of the mirror, I was stunned! The skin on my face looked like it belonged to someone else! It was so smooth, clear, and glowing. My forehead was not oily like I thought it would be, even after hours of sleeping.
Jojoba oil isn't really an oil, but rather a "wax ester". Out of all the compounds in nature, it is the most similar to human skin oil (sebum). The theory is that jojoba can cause your skin to think it has produced enough oil, thereby balancing oil production.
Jojoba oil is not water-based, so it does not evaporate during the day like moisturizers. It's easy to spread over the skin and it absorbs well. Unlike most oils, it does not become rancid or lose antioxidants over time.
You can apply it directly to your skin, or add a few drops to your moisturizer before applying. It works beautifully to remove makeup without irritation to the eyes. Jojoba oil is very beneficial as a hair product. Massaging it into the scalp helps prevent dandruff. A small amount can be worked into the hair as a leave-in conditioner.
Jojoba oil can be expensive, but it is worth every penny. Considering the number of products it can replace, it is a work-horse ingredient.
March 18, 2011
The Butterfly Loom
If you have always wanted to create a beautiful blanket with yarn, but have never learned to crochet or knit, the Butterfly Loom might be of interest to you. The only skill you need to posses is the ability to tie a knot.
Check out some of the beautiful blankets I have made using the medium loom and the large loom:


Check out some of the beautiful blankets I have made using the medium loom and the large loom:


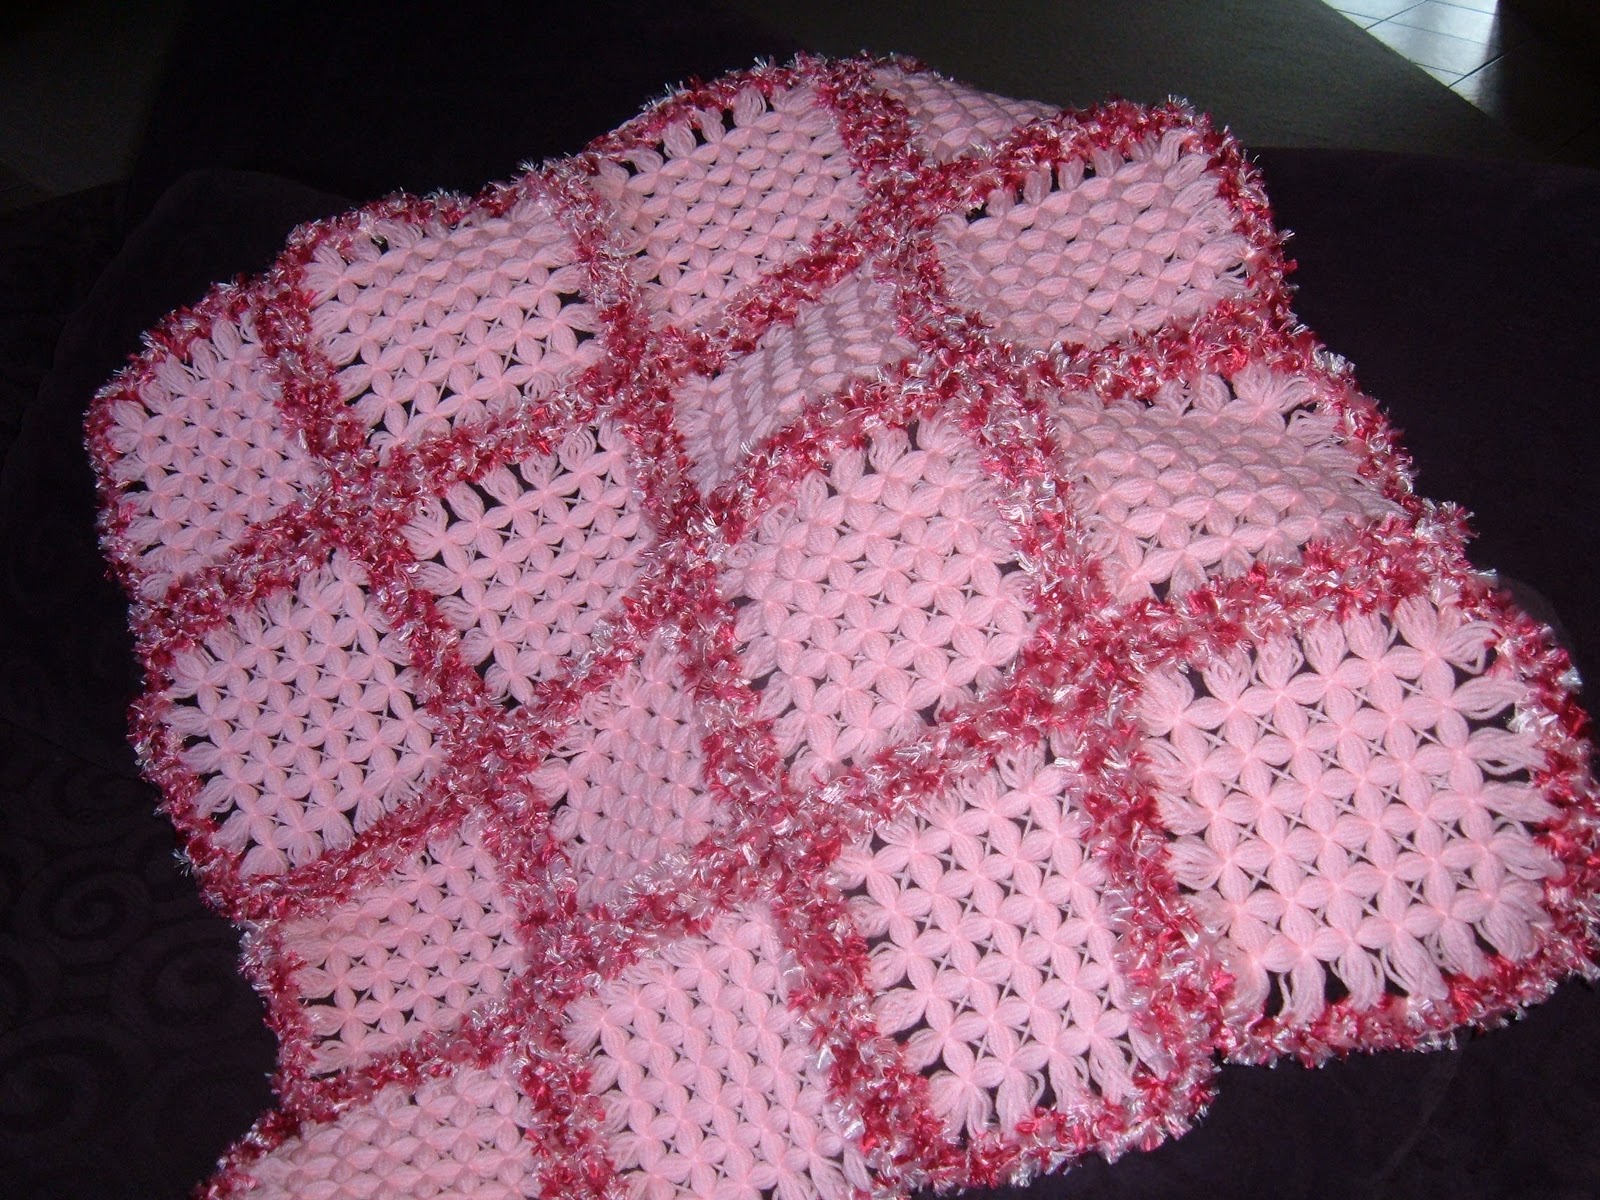


These really are simple to make, but they are time-consuming. It takes roughly two hours to complete one large square (about 15 minutes for a medium-square). But the results are gorgeous!
March 4, 2011
Dried Apples and Bananas
My generation has very little personal experience with food preservation beyond what they purchase in a can at the supermarket. Our parents and grandparents routinely canned the bounty of their garden harvests, but again, gardening is also something that few of my generation have any experience with.
One of the easiest ways to preserve fruits and vegetables is drying them. Dried fruit makes delicious and nutritious snacks. Dried vegetables are great for adding to soups and stews. We'll talk about more of the finer details of drying produce in upcoming posts.
I recently dried some bananas and apples for daytime snacks. I chose to simply slice the apples into thin wedges because I don't have a coring tool. If you have a coring tool, they would look really nice sliced into rings with the core cut out. Many people will pretreat their apples with lemon juice to keep them from turning brown, but I did not do that and they turned out beautifully. Dried apples taste great when they are lightly sprinkled with cinnamon. Add the cinnamon BEFORE drying!


Bananas make a delicious dried snack. I personally don't like the rock-hard store-bought version. I like to stop drying once they are chewy, but not squishy. Most people slice the bananas and pretreat them with lemon juice to prevent browning. I don't do either. I cut the banana in half in the middle, then, following one of the little grooves, I cut those segments in half lengthwise. You are then able to divide each of these sections into three pieces by running your thumb along the other grooves. So one banana will yield 12 thin, uniform-sized wedges when cut this way.


My dad loves to name things. He has dubbed this version of dried bananas as "monkey bones".
Watch for upcoming posts on food drying. I'll suggest an inexpensive food dryer, a great book, and yummy things you should try.
One of the easiest ways to preserve fruits and vegetables is drying them. Dried fruit makes delicious and nutritious snacks. Dried vegetables are great for adding to soups and stews. We'll talk about more of the finer details of drying produce in upcoming posts.
I recently dried some bananas and apples for daytime snacks. I chose to simply slice the apples into thin wedges because I don't have a coring tool. If you have a coring tool, they would look really nice sliced into rings with the core cut out. Many people will pretreat their apples with lemon juice to keep them from turning brown, but I did not do that and they turned out beautifully. Dried apples taste great when they are lightly sprinkled with cinnamon. Add the cinnamon BEFORE drying!


Bananas make a delicious dried snack. I personally don't like the rock-hard store-bought version. I like to stop drying once they are chewy, but not squishy. Most people slice the bananas and pretreat them with lemon juice to prevent browning. I don't do either. I cut the banana in half in the middle, then, following one of the little grooves, I cut those segments in half lengthwise. You are then able to divide each of these sections into three pieces by running your thumb along the other grooves. So one banana will yield 12 thin, uniform-sized wedges when cut this way.


My dad loves to name things. He has dubbed this version of dried bananas as "monkey bones".
Watch for upcoming posts on food drying. I'll suggest an inexpensive food dryer, a great book, and yummy things you should try.
February 28, 2011
Herbal Tinctures
I'm pretty sure that many of my friends think I'm from another planet, or a freak of nature, and no doubt they think I'm just plain weird. It's because I don't quite think like most people, I guess. I've never been satisfied with following "the norm". Not because I WANT to be different than everybody, but because the way I see it, "the norm" is not necessarily the best option. I think it's important to continuously examine and learn about the things we put on and in our bodies.

I'm an avid learner, and I recently began learning about herbal remedies. A friend started doing herbal classes in her home and I've been making my own tinctures in my kitchen. It's very easy, and surprisingly inexpensive.
What is a tincture? Most people are accustomed to making tea from herbs, and there are tremendous health benefits that can be derived from various herbs. But sometimes we need a more potent form than what we would get from drinking it as a tea. That's where tinctures come in. The herbs are placed in a medium (apple cider vinegar, glycerin, or alcohol), and all the potent and beneficial elements are extracted from the herb over a period of 4-6 weeks. They are then taken in very small doses (usually 2-3 droppers full).
For example, the first herbal tincture I ever made was for nourishing the endocrine system. This particular blend came already mixed and includes: wild yam, sarsaparilla, black & blue cohosh, false unicorn, dong quai, sage, licorice and dandelion. Each of these herbs contains properties that nourish the endocrine system (which is primarily your hormones).

To make this particular tincture, you simply fill a glass jar half full with the herb blend, and cover completely with vodka or apple cider vinegar (I used the vinegar because of the added nutrients). Cover with plastic wrap and a lid. Shake daily for 2 weeks. Strain, and put in a bottle with a dropper. Take 2-3 droppers in the morning and the evening.
Herbs take some time to accumulate in your system, so it may take a few weeks or even a couple of months before you begin to notice a difference. This tincture can also be given to children who have reached puberty at half the adult dosage. And the endocrine tincture is not just for women! Men need it, too!
I got my endocrine blend from Southwest Herb, located in Mesa, Arizona.
I'm not an expert herbalist, but I'm thrilled to share with you the things I'm learning. One of the greatest companies for herbs is Mountain Rose Herbs, located in Eugene, Oregon. Their herbs are inexpensive, and you might be inspired just by browsing through their website.
Subscribe to:
Posts (Atom)